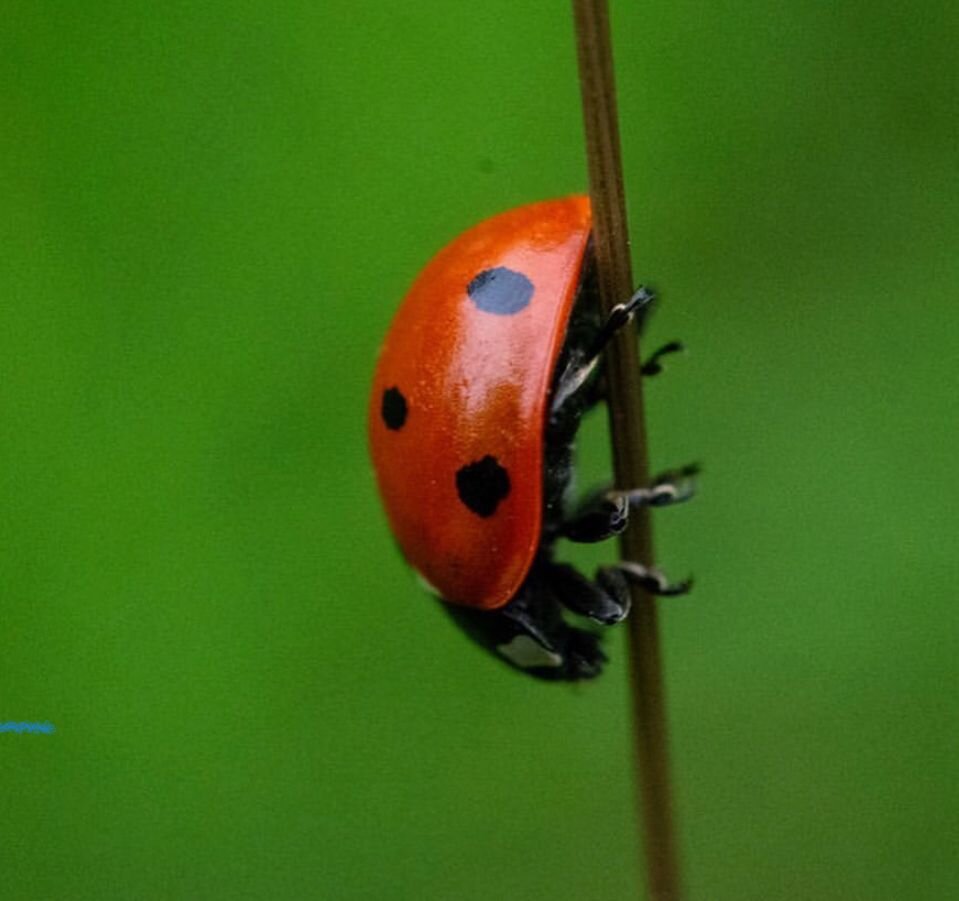
Photo Credit: James Wong @jameswongmacro
MATERIALS LIST
Canvas: 6x6 inch canvas or paper.
Acrylics: White, Black, Cadmium Red, Cadmium Yellow (or any Yellow), Phthalocyanine Blue (or any Blue), Raw Sienna, Orange (or Red with Yellow).
Brushes: Small round detail brush, Small flat brush, Micro or liner detail brush.
Reference: Lady bug photo above.
Mix up Cadmium Yellow with Phthalocyanine Blue to create a vibrant green. Let dry for 3-5 minutes or so before moving onto the next step.
Once your canvas is tacky or dry, with Black paint and a detail round brush, draw a long stick positioned vertically. Then, draw the lady bug outline on the left side, center of the stick, facing down.
Artist Tip: Learn from my mistakes here, leave any spots or markings until after the first coat. For this lady bug I recommend painting the wings first, then placing spots overtop. It saves time and can be less cumbersome trying to paint around each spot.
Mix up Cadmium Red with a tiny bit of Black. Apply this color to the wings. The light source is coming from the upper right hand side which means we need to keep the top right side of this lady bug the lightest point. The bottom left side of the lady bug will need to be kept dark.
Artist Tip: Your first or second step of any painting should be to define the light source! Knowing where that light is coming from will help you choose and place the correct colors.
Mix up lots of Cadmium Yellow with a tiny bit of Phthalocyanine Blue and White. With a small or medium flat brush, paint in leaves around the outside edge of your canvas. Paint the leaves going in all different directions.
Make sure the lady bug is at least tacky or dry before applying the next layers of paint. Using just Cadmium Red, apply the medium tones.
Artist Tip: What are medium tones? These are the colors with the “middle values.” They get more light than the darkest areas, but less light than our lightest areas. It’s the “in-between colors” that join our darks and our lights. You will likely have multiple medium tones, not just one, in your acrylic paintings.
Using a micro detail brush, liner brush, or the edge of your flat brush, paint a thin line of Black in the center of each leaf, stop before you get to the tip of the leave.
Mix a tiny bit of Orange into Cadmium Red. Apply the next lighter medium tone to the lady bug, moving closer to the light source.
Wash our your brush and mix up Cadmium Yellow with some Phthalocyanine Blue to create a shade of green that is darker than the leaves, but a bit lighter than the background green. Using your detail brush, add short lines of this Green along both sides of the center line on each leaf. Lines get longer towards the base of each leaf.
Add a little White to your Orange and Cadmium Red mixture. Apply light tones to the edge of the lady bug wings and the areas facing the light source. It’s all about layers with acrylics!
Once your wings are layered with dark, medium, and light tones of red, add the Black spots overtop. Mix up White with a little bit of Black to create a medium Grey. Add that grey to the one spot getting hit with more light.
Use that same medium Grey to add lines of highlights to the tiny legs and the front of the head. Reference the original painting for help shown up above.
Add just Raw Sienna to the very top and bottom outer edges of the stick.


